Location of this document:
https://carnegie-observatories.github.io/mike/MIKE/mikegui3.html
Quick Look Tool
Configuration Window
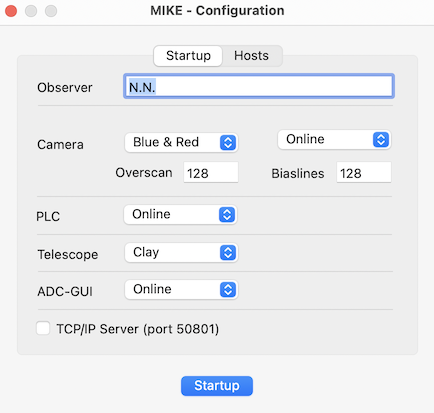
- Observer: [edit] : observer's name
- Camera: [menu] : {Blue,Red,Blue+Red}
- Select one or both cameras.
- [menu] : {online,simulator}
- simulator: for tests with no dewar
- online: dewar electronics are connected and running
- Overscan: number of overscan pixels at the end of the readout line (default 128).
- Biaslines: number of bias lines after the CCD lines (default 128).
- PLC: [menu] : {offline, online }
- offline: for tests with no PLC connected
- online: mechanics and electronics connected and running
- Telescope: [menu] : { offline, Clay }
- ADC-GUI: [menu] : {offline, online }
- TCP/IP Server: enable the TCP/IP interface (port 50801) when checked (default on).
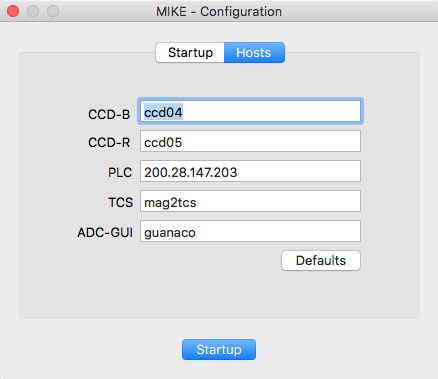
The Hosts tab sets the hostnames/IPs used to reach the
CCD-B, CCD-R, PLC, TCS and ADC-GUI servers. The Defaults
button restores the built-in values
(CCD-B ccd04, CCD-R ccd05, PLC 200.28.147.203:502,
TCS mag2tcs:5811, ADC-GUI guanaco:52401).
At startup the GUI switches both calibration lamps off, and reads the UT
from the TCS. The difference to the Mac clock is logged ("offtime=") and
applied to all exposure time stamps in the FITS header (DATE-OBS, UT-START,
UT-TIME, ...). Restart the GUI if the TCS clock was wrong at startup.
The GUI always uses the light appearance, regardless of the macOS Dark Mode
setting. If "Warning: AppNap enabled" appears at launch, run
defaults write <bundle id> NSAppSleepDisabled -bool YES and
restart the GUI.
Instrument Control and Data Acquisition
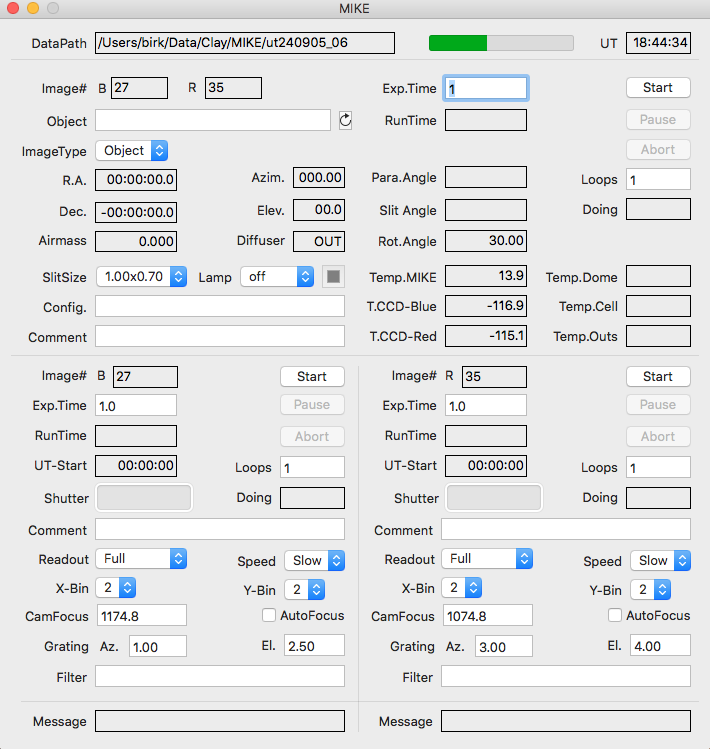
The Exp.Time, Loops, Start, Pause and Abort controls in the upper panel act on
both cameras; the controls in the lower Blue (B) and Red (R) panels act on one
camera.
- ExpTime: sets the exposure time (1..8200 seconds)
- Object: OBJECT value in the FITS header.
- This field will be sampled at the beginning of the readout.
- The 'reload' button reads the object name from the TCS catalog.
- Loops: number of exposures per sequence (1..99).
- ImageType: sets the exposure type
{ Object, Comp, Bias, Dark, Flat }
- SlitSize: Move the slit plate to the selected slit.
- Lamp: Select the lamp from {off,Quartz,ThAr} .
- As a safety feature, if a lamp stays on for 30 minutes with no
exposure loop active on either camera (i.e. no exposure or readout
in progress), the GUI automatically switches the lamp off. The idle
time restarts whenever an exposure runs or a lamp is selected, so
the lamp is not switched off during a sequence of exposures. When
this happens a warning window names the lamp and the UT at which it
was switched off; it stays open until closed by the user, and the
event is written to the log file.
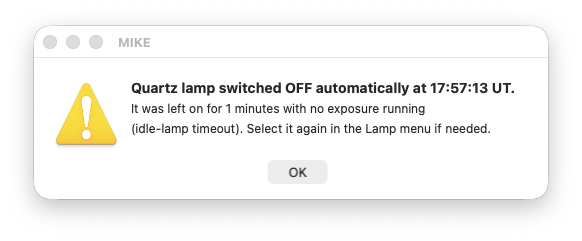
(example, taken with the timeout shortened to 1 minute for testing)
- Only a lamp selected in this GUI (menu or TCP/IP lamp command)
is tracked by the auto-off timer. While a lamp is on, the indicator
next to the Lamp menu blinks green.
- Config: CONFIG value in the FITS header (configuration notes).
- Comment (upper panel): INSTCOM value in the FITS header (both cameras).
- Comment (camera panels): CAMCOM value for that camera,
truncated to 60 characters.
- These fields are sampled at the beginning of the readout. Keep
Object, Config and Comment entries under ~60 characters (one
80-column FITS card).
- Image#: next file name number (rNNNN.fits,bNNNN.fits);
wraps to 1 after 9999.
- The number may be set using the
Camera--FileNumber menu.
- Start: starts a loop sequence of Loops exposures.
- Pause: close the shutter and stop the exposure timer.
- Resume: open the shutter and re-start the exposure timer.
- Abort: asks for confirmation, then aborts the current exposure
or readout. An aborted readout is discarded and its file number is
re-used by the next frame.
- Readout: sets the readout mode { Full, Subraster }
- Selecting Subraster opens a sheet to define up to 6 subrasters
(XYWH or XXYY coordinates; Load/Save/Clear/CopyToAll; SaveMode
Full/Minimal). If no subraster is defined the mode reverts to Full.
- Speed: sets the readout speed/gain combination { Slow, Fast}
- Gain / read noise written to EGAIN/ENOISE:
Blue Slow 0.45/2.7, Blue Fast 0.90/3.1,
Red Slow 0.90/2.8, Red Fast 0.90/3.1 (e−/DU, e−).
- Binning: set the binning { 1-8 x 1-8 }
- CamFocus: move the camera focus mechanism.
- AutoFocus: [check] when enabled, the GUI samples the instrument
temperature every ~2 minutes (suspended during exposure loops) and
corrects the camera focus per
F(blue) = 1171.0 − 1.9·T,
F(red) = 1091.0 − 1.6·T.
A move is issued only when the deviation exceeds 3 units.
- Diffuser: read-only status of the diffuser (IN/OUT).
- If a science exposure (ImageType=Object, Exp.Time≥60) is
started while the diffuser is not OUT, the GUI opens a warning
dialog.
- Grating: grating position (FITS header only, no motion control).
- Filter: filter for the FITS header (no motion control).
TCP/IP Interface
When enabled, the GUI listens on port 50801.
Each command must be terminated
by a [LF] (ASCII=10, 0x0a, '\n') character.
The response string will also be terminated by a [LF].
All communications are initiated by the client (your program).
Command names may be abbreviated and are case-insensitive (except
object, autofocus and datapath); parameter values
(lamp, image type, speed and slit names) are case-sensitive. Unknown
commands are answered with unknown command '<cmd>' after a
1 s delay.
An easy way to test the interface is the 'nc' (netcat) utility. It can be
run like a terminal emulator (^D terminates the connection) or be used in scripts:
xterm> nc localhost 50801
version
v3.8 (131c1f8)
^D
xterm>
- Command: autofocus {blue,red} {0,1}
- Command: autofocus {0,1} {0,1}
-
- Response: # #
- Turn on/off the AutoFocus feature for the red/blue camera.
- The second form allows to switch both cameras at the same time.
With a single parameter both cameras are switched; without parameter
the current state (order: blue red) is returned.
- Command: binning # #
- Response: # #
- Set or request (without parameter) the binning for both cameras
- #: horizontal binning {1,2,3,4,5,6,7,8}
- #: vertical binning {1,2,3,4,5,6,7,8}
- With a single parameter the same binning is used for both axes.
Invalid values are ignored. The GUI returns the current binning.
- Command: camfocus {blue,red} #
- Command: camfocus # #
- Response: {0,1,2} [Eautofocus]
- Moves the 'red' or 'blue' camera focus.
The GUI responds with the number of focus motors moving, ie. '0' is returned
when an error occured.
- If no color is given you may send both camera foci (order: blue red).
-
- Please note that this command does not
block until the motion has stopped; you have to check
using the 'status' command.
- If the AutoFocus feature is active, the string "Eautofocus" is
appended to the return string.
- Command: camfocus
- Response: # #
- Without any parameters the GUI returns the focus of both cameras.
- Command: camfocus {blue,red}
- Response: #
- Returns the focus of one camera.
- Command: datapath1 [path]
- Command: datapath2 [path]
- Response: string
- Sets/returns the primary (secondary) data path.
- 'datapath' may be used instead of 'datapath1'.
- The path must not contain spaces. If the directory cannot be created or
is not writable, the setting is not changed and the current path is
returned.
- Command: datapath2 none
- To allow clearing the 'datapath2', the special keyword 'none' (no quotes)
may be used.
- Command: diffuser
- Response: {0,1,-1}
- 0: OUT
- 1: IN
- -1: failure to read the status
- Command: exptime {blue,red} #
- Response: #
-
- Set the exposure time for the 'red' or 'blue' camera in seconds.
If no color is given, the time is set for both cameras.
- The GUI reponds with the current exposure time.
- Command: exptime # #
- Response: # #
-
- Set or request (without parameters) the exposure time for both cameras
(order: blue red).
- Request: exptime
- Response: # #
-
- Without any parameters the GUI returns both exposure times
(order: blue red)
- Command: frame {blue,red} #
- Response: #
- Command: frame # #
-
- Command: frame #
-
- Response: # #
- Set the frame number (file name) the red/blue camera.
- The second form allows to switch both cameras at the same time.
- If there is only one parameter, both frame numbers are set to the same value.
- Without parameter (or with values ≤0) the next frame numbers
(order: blue red) are returned.
- Command: imagetype {Object,Comp,Bias,Flat,Dark}
- Response: string
- Set or request (without parameter) the image type.
The GUI responds with the current image type.
- Command: lamp {off,Quartz,ThAr}
- Response: string
- Set or request the lamp.
- The GUI returns the current lamp status.
- Command: loops #
- Response: #
- Set (or request) the number of exposures in the loop.
The GUI responds with the loop number. Valid range 1..99; the value
applies to both cameras.
- Command: object string
- Response: string
- Set or request (without parameter) the object name.
- The GUI responds with the current object name. Names longer than 56
characters are truncated.
- Command: runtime
- Response: # [est]
- Returns the calculated remaining time in the current exposure loop.
The string 'est' is appended if a non-measured binning/speed combination is active.
Returns '0' when no loop is running.
- Command: slit name
- Response: {0,1}
- name may be any of the slit names in the slitSize menu
(case-sensitive, eg. 0.35x0.35, 1.00x0.70, 0.50x5.00).
- The GUI responds with '1' if a valid position name
was requested (ie. the slit motor has started to move), or
'0' on failure.
- Please note that this command does not
block until the motion has stopped; you have to check
using the 'status' command.
- Command: slit
- Response: name
- Without any parameter the GUI returns the slit position name.
-
- Command: speed {blue,red} {Slow,Fast}
- Response: speed
- Command: speed {Slow,Fast} {Slow,Fast}
-
- Response: speed_blue speed_red
- Set the readout speed of the red/blue camera.
- The second form allows to switch both cameras at the same time.
- If there is only one parameter, both speeds are set to the same value.
- Command: start
- Response: {0,1,2} | -Eexposing
- Start an exposure loop on all configured cameras. The GUI responds
with the number of cameras whose loop is running (2 = both started,
0 = failure). If a loop is already running, the command is refused
with '-Eexposing'.
- If the diffuser warning dialog appears (see Diffuser),
the response is delayed until the dialog is answered.
- Command: status
- Response: # # #
- #: {0,1,2}: number of cameras with an exposure loop running
- #: {0,1}: '1' means that the slit is moving
- #: {0,1,2}: indicates the number of focus motors moving
- Command: tempmike
- Response: #
- Returns the instrument temperature.
- Command: version
- Response: v3.8 (131c1f8)
- Returns the release version and the git commit (short SHA) of the running GUI.
Main Menu
MIKE --
File --
Camera --
Help
Menu - MIKE
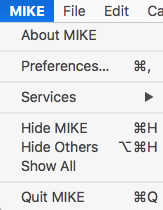 |
About MIKE: shows the release version and git commit of the GUI,
eg. "Version v3.8 (131c1f8)".
Preferences: opens the Preferences window.
Quit MIKE: terminate this GUI.
|
Menu - File
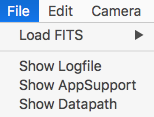 |
Load FITS: submenu {Blue, Red} — loads a FITS file
from disk into the QuickLook display tool
for the selected camera.
Show Logfile: opens a Console window that displays the logfile.
Show AppSupport: opens a Finder window displaying the content
of the Application Support folder.
Show Datapath: opens a Finder window displaying the content
of the data path folder.
|
Menu - Camera
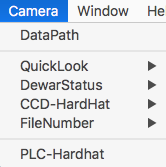 |
DataPath: opens a dialog
that allows to set the path for the data (FITS) files.
QuickLook: opens the QuickLook Tool windows.
DewarStatus: opens the Dewar Status window.
CCD-Hardhat: opens the CCD Hardhat window.
FileNumber: enables (temporarily) the File number edit on the
Data Acquisition window.
PLC-Hardhat: opens the PLC Hardhat window
(requires Engineering Mode).
|
Menu - Help
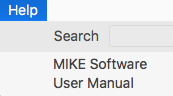 |
MIKE Software: opens
this
web page.
User Manual: opens the LCO
User Manual.
|
Preferences
General --
Camera --
QuickLook
Preferences - General
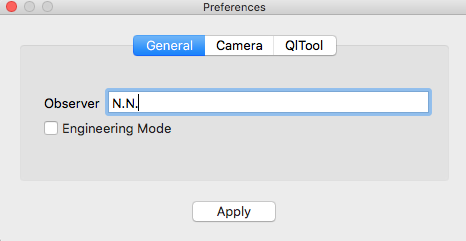
- Observer: observer's name for the FITS header.
- Engineering Mode: Some functions require to switch to engineering
mode as safety feature.
- eg. the PLC-Hardhat and the CCD-Voltages.
- Engineering Mode is not saved; it is off after every restart of the GUI.
Preferences - Camera
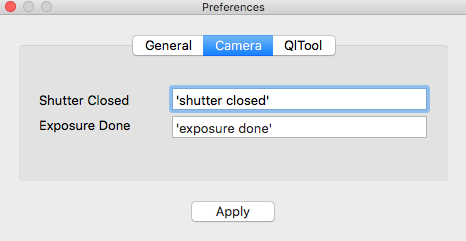
- Shutter Closed: sound after the shutter closes on the last exposure
of a loop (before its readout); not played for Bias or Dark.
- Exposure Done: sound when the whole loop has finished. If the loop
fails, 'exposure loop failed' is spoken instead.
- If the the text in the edit-box is enclosed in single quotes ('),
it will be spoken using the default system voice; otherwise the
string will be interpreted as a sound file name and be played.
-
- Unless an absolute path is given, the file is expected to reside in
the "/Users/Shared/Library/Application Support/MIKE" directory.
Preferences - QuickLook
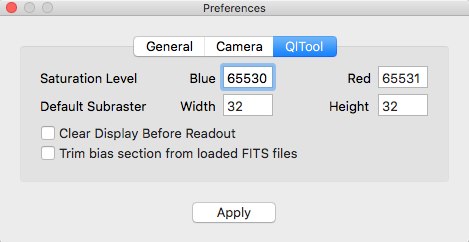
- Saturation Level: pixels above this level will be shown in red
(per camera, default 65535).
- Default Subraster: subraster width and height (8..512, default 32)
when adding a subraster using the 'a' key on the display.
- Clear Display Before Readout: clears (black) the display before
a new exposure is read out.
- Trim bias section from loaded FITS files: when checked (default),
the bias sections (overscan and biaslines) are removed from FITS files
loaded from disk; uncheck to display them in the QuickLook tool.
- Does not affect data read directly from the array.
Auxiliary Windows
DataPaths --
DewarStatus --
CCD-Hardhat --
PLC-Hardhat
Data Paths
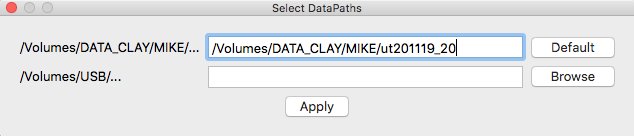
Select the data path(s) for the FITS files.
- Default: sets the path following the standard at the Magellan telescopes:
/Volumes/DATA_CLAY/MIKE/utYYMMDD_DD (night date, UT−9h).
- Browse: opens a file selector that allows to set an optional secondary data
path (eg. an external USB disk)
- Each frame is written to both paths. In the primary path,
b.fits / r.fits are symbolic links to the last
completed frame.
Dewar Status
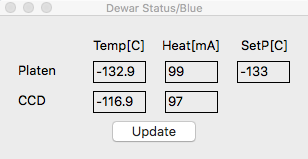
- Displays the temperatures, heater currents and setpoints of the
DSP control loop.
CCD Hardhat
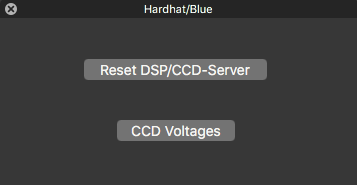
- Reset DSP/CCD-Server: reloads the DSP code.
- CCD Voltages: opens a window that allows to modify the
CCD voltages (requires engineering mode)
PLC Hardhat
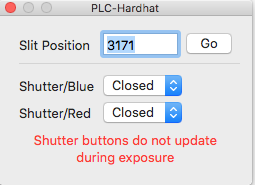
- Slit Position: manually move the slit.
- Shutter: manually open/close the shutter.
- The PLC Hardhat window only opens in Engineering Mode.
QuickLook Tool
Per-camera display that updates after each readout (and can also load
FITS files from disk via File → Load FITS). It opens two
windows:
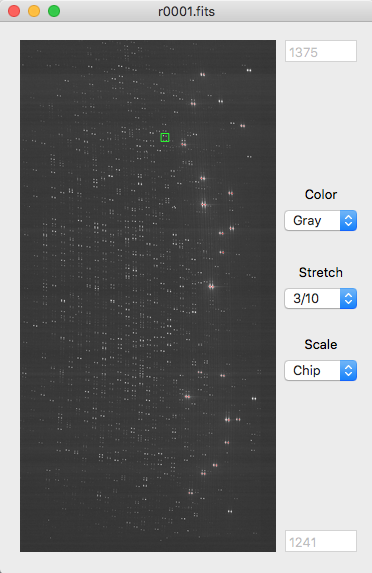
- Overview: full-frame image.
- Scale: {cuts, med3, med5, 3/10, mima} sample
statistics used to set the display range.
- Stretch: {Chip, Global} apply the range per chip
or across the whole frame.
- Color: lookup table {Gray, BBdy, Rain, InvG}.
- Pixels above the
Saturation Level are shown in red.
- Click selects the magnified pixel; arrow keys nudge it
(Shift/Ctrl/Opt/Cmd ×5). Key a adds a
default-size subraster at the cursor,
r removes one (keys a/r only while the Subraster
sheet is open), space runs a FWHM fit. Dragging moves the
magnifier; right-click (or Ctrl-click/drag) changes the colour-map
contrast. Arrow keys and space also work in the Magnifier window.
- Loading a FITS file is refused while an exposure loop is running.
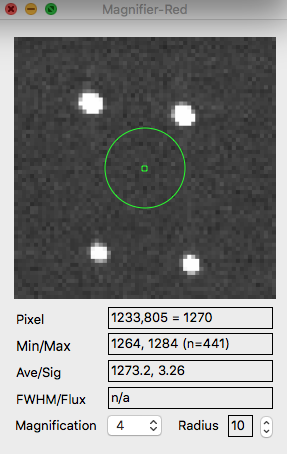
- Magnifier: zoomed view with Pixel, Min/Max, Ave/Sig,
FWHM/Flux, Magnification and Radius readouts.
MIKE Software Documentation
April 2003,
Christoph C. Birk, Carnegie Observatories